
Waxing is one of the go to beauty and pampering sessions of anyone(particularly women) who likes to have their hair removed. From getting rid of hair from the eyebrows, armpits, bikini area, and legs, each waxing salon have helped a lot of people to achieve a hair-free skin.
However, since this pandemic hit, waxing salons have halted their operations for safety purposes. This prompted many women to find alternative options such as trying out DIY or homemade waxing. In this article, we will discuss everything you need to know before, during, and after waxing at home.
Types of Homemade Wax
Each body responds differently to the type of wax being applied to their skin. Some may find hard wax more comfortable than cold wax and vice versa. Whereas, others opt for the all-natural sugar wax. If you are not certain what kind of wax will suit you best, check out the comparison below and try for yourself.
Soft Wax

Soft wax adheres to the skin more than the hair follicles. This means that if you want to exfoliate your skin more while getting rid of unwanted hair, this type of wax will suit you. Soft wax is also known as the type of wax that uses spatula to scoop the product and uses non-woven removal strips.
Furthermore, since soft wax grabs more hair, it is suggested to use this in large areas of the body such as the legs and arms and other non-sensitive parts. When working with soft wax, it is very important to maintain its warm temperature. If it is cool enough, the strip won’t stick to the skin properly causing less or no hair at all to be removed. On the other hand, if it is super hot, it will cause you skin burns and the product will be runny that it won’t stick to your hair properly.
Hard Wax

Compared to soft wax, hard wax does not use removal strips to get rid of the wax that has been applied to the hair. This type of wax is ideally used for people who have sensitive skin. Contrary to some assumptions, hard wax is considered to be the “more gentle” type of wax than soft wax. Having said this, it is suggested to apply this product on smaller and sensitive areas of the body such as the bikini line, armpits, upper lip, eyebrows, and face.
Hard wax works by applying a thicker layer of the product on a particular area and waiting for it to harden (about 5 minutes) before pulling the wax away from your skin. Take note that when applying hard wax, always leave a fold at the end of the wax so you can remove it easily.
Sugar Wax

Sugar wax or sugaring is one of the most popular type of wax that most people use at home. Because it is made with natural and organic ingredients, the chances of the product irritating your skin is lesser. It is also considered to be the less painful type of wax as it is removed against the growth of the skin.
Sugar wax can also be adjusted to the consistency of soft wax or hard wax depending on your preference. In addition, what sets sugar wax different is that its residue can easily be washed off with water. No need for any oil or post-wax treatment that is needed when residues are left from soft and hard wax.
Recipe of Homemade Wax
Since sugar wax have all-natural ingredients that are easy to find in stores or even in your own kitchen, this has been the ideal type of wax to make at home. Whether you want to achieve a soft or hard consistency, you can always find this recipe from Hello Glow flexible to your taste and needs.

Equipment:
Candy thermometer
Medium saucepan
Materials:
2 cups white sugar
1/4 cup lemon juice
2 tablespoons water
1 teaspoon salt
Instructions:
1. Add all ingredients to a pot, and without stirring, turn the heat to medium-high (stirring can cause sugar to crystalize on the sides of your pot). If you have one, attach your candy thermometer to the side of the saucepan so you can watch the temperature closely as it cooks.
2. Once the sugar mixture starts to boil, gently swirl the pot to mix the ingredients.
3. Keep a close eye on the mixture and cook until it turns the color of honey or until your thermometer reads 260 degrees F (this took about 5 minutes for me, but it could vary depending on the size of your saucepan).
4. Immediately remove wax from the heat and transfer it to a glass jar to stop the cooking process (the wax can shatter cold glass, so run your jar under hot water for a minute to prep it for the wax). Meanwhile, take a spoonful of wax and put it in the freezer. Wait until it has cooled completely, then check the consistency. It should be stretchy like a piece of bubble gum and slightly sticky. If it’s too runny, return wax to the pot and boil for another 30 seconds. If it’s too hard (like crunchy candy), either add more water and boil a little longer or throw it out and start over.
5. Once your wax is the right consistency, let it cool completely before applying to skin.
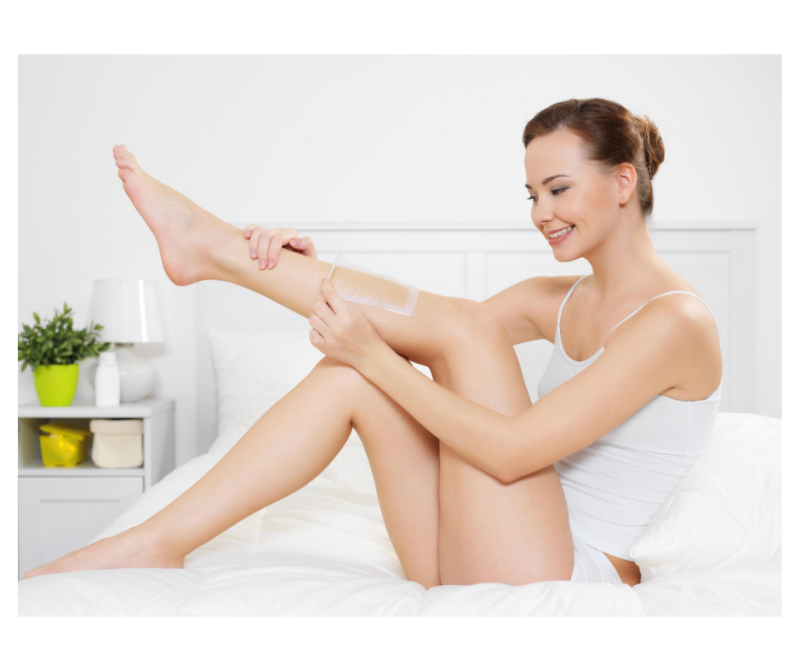
How To Wax
After gathering all your ingredients and preparing your mixture, it is time to apply the wax on your skin. Make sure to follow these instructions carefully to achieve a hairless skin in no time.
Soft wax process (instructions from wikihow.com)

1. Check the length of the hair that you want to remove. Your hair should ideally be between 1/8-inch and 1/4-inch (3 mm and 6 mm) long.
- If your hair is too short, then the wax won’t pull the hair out by the roots.
- If your hair is too long, you may experience a little bit of discomfort.
2. Prepare your strips of fabric. If you don’t have strips already, you can cut up or tear up a cotton or linen shirt.
- To fix frayed edges, sew around the edges of your strips with a sewing machine.
3. Dust the area with baby powder before applying the wax. Baby powder or cornstarch will absorb body oils and moisture, allowing the wax to stick to the hair (not your skin), making the process much less painful.
4. Apply the wax. Using a wooden tongue depressor or a spatula, apply your homemade wax where desired. Apply the wax in the direction of hair growth
5. Press the fabric into the wax. Take a strip of cloth, place it on the wax, and smooth it in with the direction of hair growth
6. Let the wax cool completely. Pull lightly on the bottom edge of your fabric strip to see if it sticks well enough
7. Remove the strip. Hold your skin taut by pulling at it from a point underneath the edge of your fabric strip and pull the strip off against the direction of hair growth. Do this very quickly. Do not pull it off at a 90° angle, but in a more shallow angle.
8. Store any leftover wax in the refrigerator. It should keep for a couple of weeks in the refrigerator, or a couple months in the freezer.
Hard wax process (instructions from Healthline.com)

1. Clean the skin of any dirt and debris to make sure that the wax adheres fully to the hair.
2. Gently exfoliate to remove dead skin, open the pores, and allow the wax mixture to more deeply penetrate the hair shafts.
3. Apply powder first to remove any excess moisture before waxing. Avoid using powder in the genital area and inhaling floating powders.
4. Apply a very small amount of oil to help hard wax stick more easily to the hairs.
5. Wax should always be applied in the direction of the hair growth and pulled off in the opposite direction.
6. Hair should be roughly 1/2 inch or longer for the best results.
7. Always test wax to be sure it isn’t too hot before applying to sensitive areas like your face.
Pros of Homemade Waxing
At first glance, doing your own wax may seem messy and time consuming. However, there are many benefits that you can actually get from making your own waxing session at home. Here are a few of them:
Saves Money

It is not a secret that having your hair removed at waxing salons cost a fortune. Not only are you paying for the products and the staff doing your wax but also a part of the price you are paying includes all expenses to maintain the salon such as rent and electricity. This means that you are spending more than what you should be because of these extra charges.
The thing is you can actually save a lot of money by just buying the materials and ingredients needed to do your own wax. The equipment does not cost so much and you can also reuse them countless of times as long as you keep it clean and sealed.
Respects Privacy

If you are the type of person who has super confidence to have your body waxed especially the private area (Brazilian waxing), then by all means go and visit your fave waxing salon. However, if you are a little shy or scared to the idea of someone removing your hair deep down there, you should try waxing at home instead.
Some people experience some sort of discomfort whenever they undergo Brazilian waxing at salons. It just makes them uneasy and scared to the point that they cry or get traumatized during the waxing sessions. But with DIY waxing, you are in control of what to do with your own body. Whenever you feel like it’s the time of the month to do your Brazilian waxing, you can just lock yourself in the bathroom and do your thing. No one needs to know what you’re doing.
Uses Natural Ingredients

Since you make your own wax, you are aware that the ingredients you are using are (1) natural and organic; (2) hypoallergenic; and (3) suits your taste. It is very important to avoid using products that contain chemicals and preservatives that may result from your skin getting irritated. Compared to waxing salons, you are never 100% sure that the products being applied to your skin are good for you in the long run. You may see that your hairs are neatly removed but later on you develop side effects such as rashes, bumps, or burns on your skin.
Still, if you wish to make an appointment at your waxing salon, make sure to always check the products they are using before undergoing the procedure. Better safe than sorry!
Cons of Homemade Waxing
If there are benefits to homemade waxing, there are also risks that may be present. Knowing these will help you to be prepared in case such situations arise.
Burns Skin

Using hot wax directly to your skin without allowing to cool can burn your skin. Since all wax have to be melted to achieve the right consistency, some people tend to get excited and scoop the product out of the jar soon as it is removed from the microwave or heating pan.
This is a common risk that people encounter when waxing on their own. To avoid this kind of accident, always make sure to test out the wax by scooping a small amount to your finger or palm before applying a thicker layer to a wider area of your body.
Doesn’t Work

The main essence of waxing is to get rid of your unwanted hair. However, when done without a professional guide, some novice users tend to just waste product without getting the job done. There are several reasons why your homemade wax may not work.
First, your skin and hair is not properly prepared. Before applying wax on your hair always make sure that it is dry enough. Aside from patting it dry with a towel, you can also apply some baby powder to the specific area to sip all water residue. Once the skin is still wet, the wax will just likely to slide off and the strip will not be able to hold onto the wax and hair.
Second, you are not pulling the strip or hard wax strong enough. Since homemade waxing can be a little scary at first, users tend to go slowly when removing their wax. If done on a slow pace, it will be more painful than it should be and may remove lesser hair.
Third, your hair is too short. When waxing, your hair should be at least 1/4 inches long for the product to grasp and uplift your hair properly. Working on a short hair will most likely irritate your skin as wax will try to pull on a hairless area.
Gets Messy
/how-to-mop-a-floor-1901114-01-c784851271e443ada648a447d6f9adb2.jpg "Waxing-Hair-at-Home")
Just imagine wax dripping on the floor, strips with hair removed lying around the sink, and powder leaving white traces everywhere. This can be your first scenario when you try waxing on your own. Since you can be a little lost as to what to do and where to start, your entire bathroom may turn into a mess.
Still, this shouldn’t be a big problem as wax can just be cleansed easily by water. Just remember to always clean your space after you did your routine to avoid getting scolded by your mom.
Homemade waxing is truly life changing once you try it. You may raise your eyebrows at first just by thinking how you will be able to do it and if it will deliver the results you need. However, just like anything you do, practice makes perfect. Good luck on achieving a hairless skin at home!