
The time of the year when people dress in costumes and put up scary house decorations is upon us. Indeed, Halloween is just around the corner. Needless to say, any spooktacular celebration is never complete without the sweet treats. There will surely be an abundance of candies on the table for the traditional trick-or-treat custom. Yet, nothing brings a smile on people’s faces better than tasty desserts handcrafted for the holiday.
In need of ideas and inspiration to fill up your Halloween dessert spread? You’ve come to the right place! Here are several tricks to the finest treats you can prepare at home for the special festivity.
Dracula dentures

Whenever the clock strikes on Halloween, you can expect that someone will transform into the famed vampire, Count Dracula. This fictional character is a fixture in many horror stories, making him an inspiration for vampire wannabes. He is widely remembered not just for his ruffled tuxedo and cape, but also for the blood-stained fangs.
Drawing inspiration from the pointed canine teeth of this bloodthirsty creature, you can whip up Dracula’s iconic dentures. Just check out this creative recipe from Delish to get you started!
RECIPE:
TOTAL TIME: 30 minutes
YIELD: 12 servings
INGREDIENTS:
• 1 tube chocolate chip cookie dough
• 1 can vanilla frosting
• Red food coloring
• Mini marshmallows
• Slivered almonds
PROCEDURE:
• Preheat oven to 350°. Get a hold of two large baking sheets with parchment paper before lining them up. Then proceed by rolling cookie dough into 1 ½” balls and placing them on baking sheets. Once done, start baking until golden for about 12 minutes. Let it cool before cutting in half.
• Pour in a few drops of red food coloring into the vanilla frosting, then stir until smooth. After that, spread a thin layer of frosting onto each cookie half.
• Take the mini marshmallows and place it around the round edges of half of the halves. Attach the remaining halves on top before placing the slivered almond on each side. By now, you should see the resemblance of the snack to Dracula’s dentures.
Ghost cupcakes

When the spirit of Halloween begins to fill the air, ghost stories are often the talk of the town. Safe to say, this seasonal event does not seem right without the concept of ghosts. So, it shouldn’t come as a surprise that it makes a great design reference when knocking up cupcakes. Here’s a recipe from Woman’s Day to try it out.
RECIPE:
TOTAL TIME: 1 hour and 5 minutes
YIELD: 24 servings
INGREDIENTS:
FOR CUPCAKES
• 1 16.5-oz box white cake mix
• 3 large eggs
• 1 cup of water
• 1/4 cup of vegetable oil
• 2 teaspoon of pure vanilla extract
• 1 tablespoon of orange coloring
FOR CREAMY MARSHMALLOW FROSTING
• 1 8-oz package cream cheese, softened
• 1 cup of confectioners’ sugar
• 1 teaspoon of pure vanilla extract
• 1 7-oz container marshmallow crème
• 1 8-oz container frozen whipped topping, thawed
FOR DECORATING
• Confectioners’ sugar, for the surface
• 1/2 5-lb. box white rolled fondant
• Black gel icing
PROCEDURE:
To make cupcakes
• Preheat oven to 350°F. Get two 12-cup muffin pans with paper liners. Line it up before setting it aside.
• Place the cake mix, eggs, water, oil, and vanilla extract in a large bowl. Using an electric mixer on medium speed, beat the ingredients for one minute. After that, increase the mixer speed to high and beat for two minutes. Add the food coloring before mixing well. Then evenly divide batter among muffin cups.
• For about 18 to 22 minutes, bake until a wooden pick inserted near the center comes out clean. Remove from oven then have it cool in pan for 10 minutes. Then to cool it completely, remove it to wire rack.
• Put the Creamy Marshmallow Frosting in a pastry bag, which should have a large round tip. Pipe the frosting onto cupcakes before garnishing with fondant ghost. Store it in the refrigerator for up to 3 days.
To make Creamy Marshmallow Frosting
• Place the cream cheese in a large bowl, then beat it until smooth for about three minutes.
• Add confectioners’ sugar and vanilla, then beat once again until it mixes through the cream cheese.
• Put in marshmallow crème. For about two minutes, beat it until creamy.
• Add whipped topping, then beat once more until combined. After that, you could either use it right away or store it in the refrigerator which can last for three days. If refrigerated, give it 30 minutes at room temperature before beating it with an electric mixer. Make sure to make it smooth and creamy.
To make Fondant Ghosts
• Using a confectioners’ sugar, dust a work surface lightly. Then proceed by rolling out fondant to 1/8-inch thickness.
• Cut rounds from the fondant with the help of a two-inch round cutter.
• Create oval shapes out of the fondant by simply rolling it out. Make sure to make it as smooth as possible.
• Make a ghost form by shaping the oval over your index finger.
• Shred the ends of the ghost, with the use of your fingers. Then proceed by setting it on parchment paper to dry. It should be dried at least for four hours.
• Use the black gel icing to pipe the eyes, then allow it to dry for 30 minutes.
Spooky Peanut Butter Spider Cookies

Peanut butter is a favorite when it comes to sweet foods that will surely satisfy the palate of Filipinos. So, there is no doubt that someone will look for its taste in any celebration, let alone Halloween. And what better way to prepare a dessert off of it than to pack it in bite-sized cookies.
Needless to say, plain peanut butter cookies are delectable, and even irresistible for some. But since it’s an annual occasion, why not design it with spiders to give a spooky feel to it. Wondering how? Give this recipe from Food Network a shot.
RECIPE:
TOTAL TIME: 1 hour and 5 minutes
YIELD: 24 servings
INGREDIENTS:
• One 5-ounce box small ball-shaped chocolates, such as malted milk balls
• 3/4 cup all-purpose flour
• 1/4 teaspoon baking soda
• Pinch of fine salt
• 1/2 cup granulated sugar
• 4 tablespoons unsalted butter, at room temperature
• 1/2 teaspoon pure vanilla extract
• 1 large egg
• 1/2 cup smooth peanut butter
• 2 ounces semi-sweet chocolate
• 1 small tube white cake decorating gel
PROCEDURE:
• Start off by positioning oven racks in the top and bottom thirds of the oven. Preheat to 375 degrees Fahrenheit. Then with a parchment paper, line two baking sheets.
• Divide the chocolate candy balls by setting apart the larger balls to the smaller ones. The former will make up the bodies of the spider while the latter will serve as the heads.
• Put the flour, baking soda and salt in a small bowl then start whisking. Get a hold of a medium bowl where you will cream the sugar and butter using an electric mixer on medium-high speed. Do it for three to four minutes, so the sugar and butter mixture becomes light and fluffy. Add the vanilla and egg before mixing until combined for about a minute. Put in the peanut butter and mix for a minute once again until creamy. Turn down the speed of the mixer to low then proceed to adding half of the flour mixture. Beat on medium until incorporated before turning the speed down to low again. From there, add the rest of the flour mixture and beat on medium until incorporated.
• Mold the dough by hand, making it into one-inch balls. Position them about an inch apart on the prepared baking sheets before baking. Do it until the cookies are light and golden brown and have spread to about two inches wide, about 16 minutes. Also, make sure to rotate the pans halfway through. To determine if the cookies are done, anticipate when they already smell peanut buttery. You can also check it by pressing with your fingers if the tops are already dry and slightly firm.
• Using a double boiler, melt the chocolate. Once removed from the heat, let it cool briefly to keep it slightly thickened.
• Remove the cookies from the oven once they are done, then transfer to a cooling rack. Take the chocolate candies and immediately place two of it directly into each cookie, putting a smaller chocolate ball toward the edge of the cookie and a larger chocolate ball directly behind it in the center of the cookie.
• Pour the slightly thickened, melted chocolate into a plastic bag then make a small hole in the corner for piping. Pipe eight legs on each cookie. It is advisable to start from the point where the two chocolate candies meet. Proceed to pipe the front four legs, which should curve up toward the head. Then pipe the other four legs at the back, which should curve up backward beyond the body. Set aside the remaining chocolate in the piping bag, reserving it for the pupils of the eyes.
• For creating the eyes, use the cake decorating gel and pipe two 1/4-inch circles on the “heads” of each spider. Then to make the pupils, use the reserved melted chocolate by piping a tiny dot in the center of each.
Dead Velvet Cake

When there are creatures lurking in a dark, Halloween night, do expect that they are searching for blood. A bloody good cake, that is. That is the reason why this Dead Velvet Cake should be a staple in your October-end celebration. It doesn’t only make as an appealing spooky decoration, but it also satisfies the insatiable hunger of trick-or-treaters. To whip one up, check out this recipe from Delish and start working on it.
RECIPE:
TOTAL TIME: 2 hours
YIELD: 1 serving
INGREDIENTS:
• 1 box Red Velvet cake, plus ingredients called for on box
• 2 8-oz. packages cream cheese, softened
• 1 stick butter, softened
• 2 1/4 cup of powdered sugar
• 1 teaspoon of vanilla extract
• 1/2 cup of cold water
• 2 tablespoon of cornstarch
• 1/2 cup of light corn syrup
• 1 teaspoon of vanilla extract
• Red food coloring
PROCEDURE:
• Preheat oven to 350º. Then, butter and flour two 9″ cake pans. Prepare red velvet cake batter according to box directions. Divide between two cake pans and bake according to instructions.
• Proceed to creating your cream cheese frosting. Start it off by beating cream cheese and butter in a large bowl until the mixture becomes light and fluffy. Add in powdered sugar and vanilla right after that until combined.
• For the “blood”, make use of a small saucepan to pour in and stir together water and cornstarch until thoroughly combined. Then turn on the heat to medium before putting in the corn syrup. Let it simmer while stirring frequently for two minutes. Remove from heat, then stir in vanilla and red food coloring.
• Get a hold of a cake plate and place the bottom cake before trimming the dome. Dampen the “blood” on the top layer of the cake. Cut the dome off the second cake, placing it upside down on the bottom layer.
• Using the cream cheese frosting, frost the exterior of the cake. Make sure to put an extra smooth layer on the topmost portion. Pour the “blood” on top while allowing some of it to drip down the sides. Serve and enjoy!
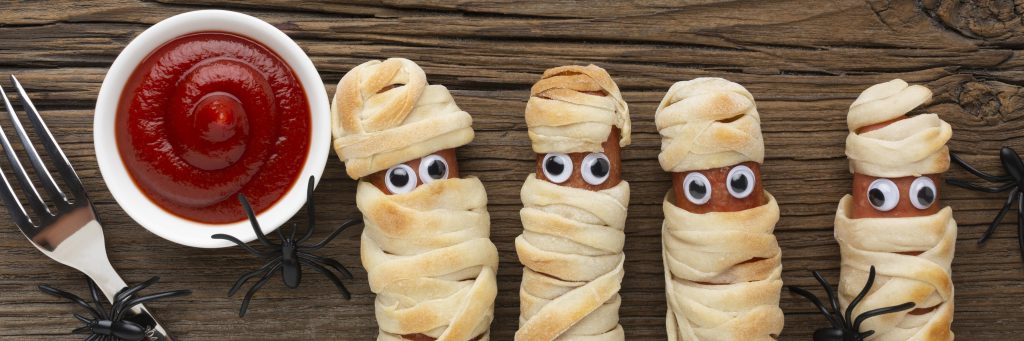
Banana Mummies

Mummies rise whenever October nears its end. But these are not your ordinary preserved corpses. Should you rip the bandages out of these Egyptian-inspired zombies, a scrumptious fruit snack would appear. So, let these Banana Mummies surprise you with its spooky-sweet taste. Want to knock up some? Let this delightful mummification recipe from Woman’s Day guide you.
RECIPE:
TOTAL TIME: 25 minutes
YIELD: 8 servings
INGREDIENTS:
• 4 pieces of bananas
• 1 pound of white chocolate
• 4 ounces of white chocolate
• 16 pieces of mini M&M’s
• 4 ounces of milk chocolate chips
• 8 Lollipop sticks
PROCEDURE:
• Line a large baking sheet with parchment paper. With the use of a lollipop stick, skewer each banana half. Freeze until firm for at least two hours.
• Place one pound of white chocolate in a large microwave-proof measuring cup, then melt it in the microwave. It is advisable to follow the directions in the package. After that, dip the bananas into the chocolate one at a time. To avoid excessive amounts of coating, you can shake it off. Return to the baking sheet, so you can put two M&M candies near the top which will serve as eyes.
• For the remaining white chocolate, melt it in the microwave, but make sure to follow package instructions. Once done, get a small piping bag with a small, round nozzle tip where you will pour the melted chocolate. Repeat this step with the milk chocolate, if you’d use it. Keep it chilled until ready to serve.
Gummy Eyeballs

Ever feel that eerie prickling on your nape like someone is looking at you? Scary, isn’t it? Now what if the one staring at you happens to be an eye-popping, delectable treat? Then there is no way around it but to gobble it up.
Made out of chocolate chips, gelatin and coconut milk, Gummy Eyeballs give off this frightening impression at first sight. But once a piece of it enters your mouth, there is no looking back. Surely, this dessert will catch the eyes of your Halloween visitors, so go ahead and try this Food Network recipe.
RECIPE:
TOTAL TIME: 1 hour and 35 minutes
YIELD: 12 servings
INGREDIENTS:
• Nonstick cooking spray, for the plastic egg holder
• 12 pieces of semisweet chocolate chips
• Two 1/4-ounce packets of powdered unflavored gelatin
• 5 drops of blue gel food coloring
• 3/4 cup of coconut milk
• a tablespoon of confectioners’ sugar
• 2 teaspoons of vodka
• 3 drops of red gel food coloring
PROCEDURE:
• Make use of a nonstick cooking spray by sprinkling some on a hard plastic 12-hole egg holder or carton. Then proceed to form the eyes by placing a chocolate chip flat-side down into each hole of the egg holder.
• Tip one packet of gelatin with ¼ cup of cold water in a small mixing bowl. Mix it until combined and free of lumps. Get ½ cup of water and heat in microwave for one minute, then pour it into the cool gelatin mixture. After that, whisk the mixture until the gelatin is completely dissolved. Add in the blue food coloring and stir. Then with the use of a pipette or eyedropper, put three to four drops of blue gelatin around each chocolate chip, forming the blue iris of each eye. Leave the egg holder in the freezer for 30 minutes, until the blue is set.
• In a small bowl, empty the remaining packet of gelatin and pour ¼ cup of cold coconut milk. Mix well. Then, put in the confectioners’ sugar before whisking until the mixture is free of lumps. Heat the remaining ½ cup of coconut milk in the microwave for about a minute. Once done, tip the hot milk into the cool gelatin mixture and start whisking to dissolve the gelatin. From there, let it cool for about five minutes, preventing the pupil and iris from melting.
• Take the egg holder out of the freezer. Carefully draw out two teaspoons of the coconut mixture into each eye until chocolate chip is covered. Place the egg holder back into the freezer and let the gelatin set in for about half an hour.
• Proceed to removal of gummies by gently pushing each eyeball with a fingertip until loosened from egg holder. Then, place them onto a serving platter of your choice.
• Concoct a mixture of vodka and red food coloring in a small mixing bowl. Get a hold of a tiny paintbrush and dip its tip into the mixture. Use that to carefully paint veins onto the eyeballs by drawing curved lines from the bottom of each gummy into the center of the iris. Let it dry for two minutes. Serve right away.
Frankenstein Pretzels

The infamous monster that was created by mad scientist Victor Frankenstein could never be duplicated. But that doesn’t mean that you can’t use it as a reference for a creation of your own. With the kitchen as your laboratory, you have the power to bring forth a monstrous dessert. So monstrous that it rushes in like an army of mini-Frankensteins, mercilessly invading your stomach. All you need is the blueprint, a recipe that is readily provided by Delish.
RECIPE:
TOTAL TIME: 20 minutes
YIELD: 12 servings
INGREDIENTS:
• 24 pieces of square pretzels
• ½ cup of creamy peanut butter
• 2 cups of white chocolate chips, melted
• 1 tablespoon of coconut oil
• a green food coloring
• 24 pieces of candy eyes
• 1/3 cup of chocolate sprinkles
• Mini pretzel sticks
• 1 cup of chocolate chips, melted
PROCEDURE:
• Divide the number of square pretzels in half. Get the peanut butter and spread it onto the first dozen. Once finished, place the remaining pretzels on top of the ones with peanut butter on it.
• Proceed to stir coconut oil into melted white chocolate. Add a few drops of green food coloring to the mixture after that before whisking to combine.
• Line a small baking sheet with parchment paper. As careful as possible, place the peanut butter-laden pretzels to the green chocolate mixture. Make sure to toss the pretzels in the mixture to achieve full coating. Then with a help of a fork, transfer to the baking sheet.
• To form the face of the mini monsters, start off by sprinkling the chocolate sprinkles on top of each pretzel. Put two candy eyes to each after that. Then break the mini pretzels into small pieces, which will serve as the ears. Stick a small piece into each side of the head.
• For the finishing touches, pour the melted chocolate into a plastic bag, then cut a little hole off of the corner of it. Use the chocolate-filled plastic bag to draw a mouth onto the pretzels.
With a long-standing tradition of trick-or-treating, it is not a stretch to say that Halloween is a time when sweet cravings are at an all-time high. So, face it – if you’re going to celebrate this seasonal festivity, make sure to prepare yourself for knocking up desserts. But, of course, never forget to enjoy while doing so. Have a spooky Halloween!